I’m pretty excited about my new make as it’s my first shirt. Shirtmaking had been floating to the top of my list but jumped to first place when my ASG group decided that 2014 would be the Year of the Blouse.

This is Burdastyle #114 from April 2010 which is a classic style shirt with yoke, collar and collar stand, cuffs, and bust darts. I figured I had plenty to learn about shirtmaking without getting too fancy so I went with an inexpensive cotton Chambray that I got from Metro textiles in NYC last summer.
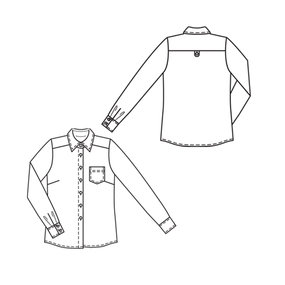
The only pattern alterations I made were to fit the yoke and shoulders and move the bust dart a bit. It’s not a very fitted style to start with so it wasn’t that difficult to fit. I also omitted the useless pocket at the bust. Also, to maintain a clean line under a jacket, I eliminated the loop at the back of the yoke.
To make this I used all of the techniques and instructions from David Page Coffin’s Shirtmaking with two exceptions. Mr. Coffin instructs you to remove the ease at the sleeve cap which I did not do since I was using a pattern with a reasonably deep cap. I also inserted the sleeves in the round after stitching the side seams. This is opposite from his recommended sequence in which the sleeves are inserted flat before stitching the side and underarm seam. I even used welt seams to attach the sleeves. I wasn’t sure I could even attach the sleeves flat due to the ease, but I just saw Pam Howard do this in her Craftsy video class with a similarly shaped sleeve so maybe I’ll try installing it flat next time.


 [My dressform is a little bit larger than me and in reality there are no strain lines at the bust.]
This make had a whole series of firsts for me which made it a challenge, but also made it quite satisfying:
- First welt seams. Not too hard if you have the right seam allowances. I would like to try again with a welting foot to see if I can make it a bit neater.
- First collar stand. Yikes, this is tedious work. There has got to be an easier method out there somewhere. The stand is tiny, and the two sides have to match, and then there’s the topstitching out there for everyone to see, right near your face!
- First successful rolled hem. I think I finally got the knack of the rolled hemmed foot. Yeah me!
- First use of a glue stick for basting. Not a bad idea.
I’ve collected a few fabrics that are destined to become shirts so I’m glad that this was a successful introduction. Now I need to decide whether to re-use the same pattern or to fit a new one. I would rank shirtmaking somewhere between pants and jackets in terms of difficulty, and easier than both in terms of fitting. I certainly could have pulled out the serger to speed things up a bit but it might be considered cheating. I found only one RTW shirt with serged seams in our closet.
Lessons learned:
- Don’t over think the button locations. I shifted them down an inch to align with the bust point but now it’s a teensy bit too low.
- Front of right armhole needs another 3/4″ or so removed to eliminate wrinkles below the arm. Requires right and left front pieces as well as right and left arms. I wasn’t ready to go there for this make.
Have you made a classic tailored shirt? How did you handle the collar? Do you cheat?
